


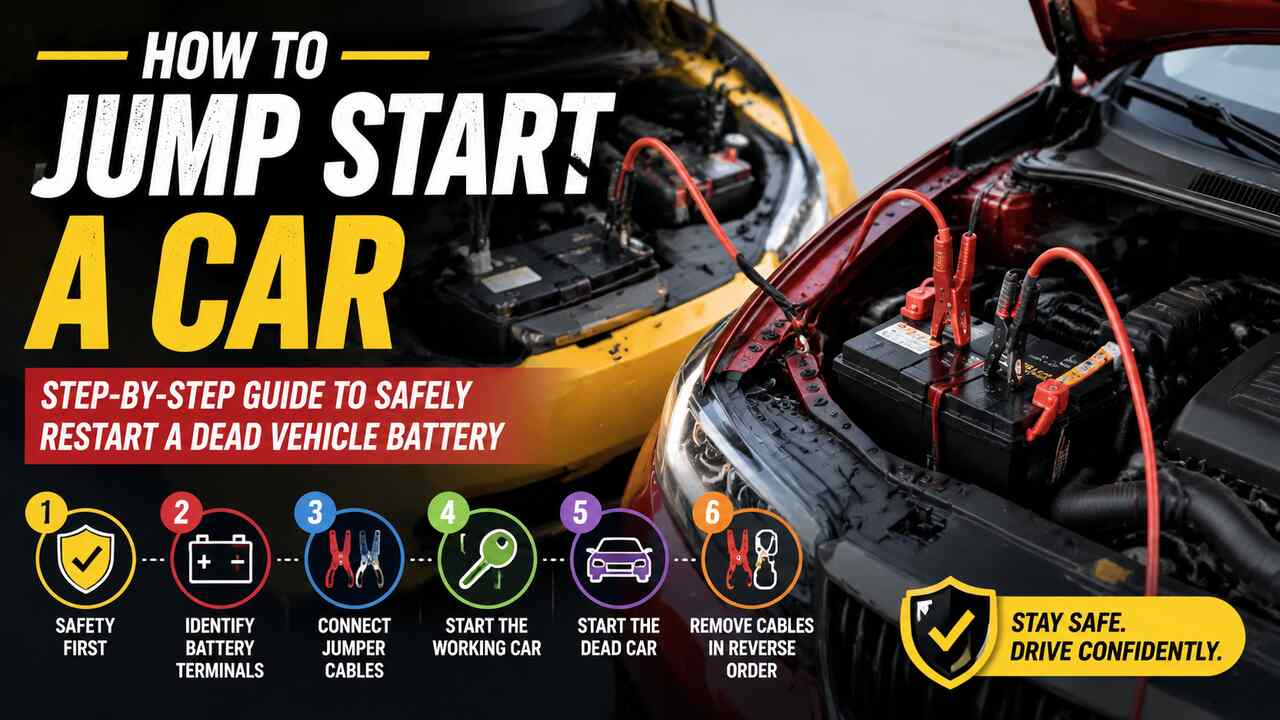

Knowing how to jump start a car is an essential automotive skill that every driver should understand. A dead battery can happen unexpectedly due to leaving lights on, extreme weather, or natural battery aging. Whether you drive a Toyota Camry, a Honda Civic, or a Ford F-150, the process of jump starting remains fundamentally similar. Understanding the correct method ensures safety, prevents electrical damage, and gets you back on the road quickly without unnecessary stress or delay.
This guide provides a complete, structured explanation of how to jump start a car using jumper cables or portable jump starters. It also covers safety precautions, troubleshooting steps, and long-term battery care strategies to help you avoid repeated issues.
Position Both Vehicles Safely and Prepare for the Jump Start
The first step in learning how to jump start a car is ensuring both vehicles are safely positioned. Proper alignment reduces risk and allows jumper cables to reach both batteries comfortably without strain or accidental disconnection.
Park the working vehicle close enough to the disabled car so the batteries are within reach, but ensure the vehicles do not touch. Turn off both engines completely, remove keys, and engage parking brakes. Place both vehicles in “Park” (automatic) or neutral (manual transmission).
Safety preparation is critical because a car battery stores significant electrical energy. Even a simple mistake in positioning can lead to sparks or short circuits. Additionally, ensure both vehicles are on a flat surface and away from traffic if possible.
Environmental conditions also matter. Wet roads, heavy rain, or flooding can increase risk. If conditions are unsafe, it is better to wait or call roadside assistance instead of attempting a jump start.
Locate the Battery and Gather Essential Jump Start Tools
Before connecting anything, you must identify the battery location and prepare the required tools. In most vehicles, the battery is located under the hood, though some modern cars place it in the trunk or under a seat for weight distribution.
A standard jump start requires a set of jumper cables and a functioning donor vehicle. Some drivers also carry a portable jump starter pack, which can be used independently without another car.
Typical components involved in this step include:
- Battery terminals (positive and negative)
- Jumper cable clamps (red and black)
- Donor vehicle battery
- Optional: protective gloves and safety glasses
Car batteries such as the 12-volt lead-acid battery are sensitive to improper handling. Corrosion around terminals is common and may need light cleaning before connection. Ensure the metal clamps are clean and free of rust for optimal conductivity.
At this stage, also inspect both batteries for cracks, leaks, or swelling. If any damage is visible, do not attempt a jump start, as it may indicate a more serious electrical issue.
Connect Jumper Cables in the Correct Order
Correct cable connection is the most critical step in how to jump start a car. Incorrect sequencing can cause sparks, battery damage, or even electrical system failure.
Follow this precise order:
- Attach the red clamp to the positive (+) terminal of the dead battery
- Attach the other red clamp to the positive (+) terminal of the donor battery
- Attach the black clamp to the negative (-) terminal of the donor battery
- Attach the final black clamp to an unpainted metal surface on the dead car (ground point)
This grounding method helps reduce the risk of sparking near the dead battery.
Connection Summary Table
| Step | Cable Color | Connection Point | Purpose |
|---|---|---|---|
| 1 | Red | Dead battery positive terminal | Establish power transfer path |
| 2 | Red | Donor battery positive terminal | Complete positive circuit |
| 3 | Black | Donor battery negative terminal | Ground donor system |
| 4 | Black | Metal ground on dead car | Safe discharge path |
Ensure clamps are firmly attached and do not touch each other during the process. Loose connections may prevent the car from starting or cause intermittent power flow.
Start the Donor Vehicle and Allow Charging Time
Once the cables are properly connected, start the donor vehicle and let it run for a few minutes. This allows electrical current to flow into the dead battery and build sufficient charge.
In many cases, waiting between 3 to 10 minutes is enough for a weak battery to regain minimal charge. However, severely depleted batteries may require longer charging time.
During this period, avoid revving the engine excessively. A stable idle is sufficient for charging. The alternator in the donor vehicle regulates output, supplying steady voltage to the dead battery.
If the donor vehicle is a larger engine, such as a Ford F-150, it may charge the dead battery slightly faster due to higher alternator output capacity compared to smaller sedans.
Start the Dead Vehicle and Monitor the Engine
After a short charging period, attempt to start the dead vehicle. Turn the ignition key or press the start button while ensuring all accessories like headlights, radio, and air conditioning are turned off.
If the connection is correct and the battery is recoverable, the engine should crank and start. Once started, allow the engine to run for several minutes to stabilize power flow.
If the vehicle does not start immediately, wait another 2–3 minutes while keeping both vehicles connected. Then try again. Avoid repeated rapid attempts, as this can strain both batteries and starter motors.
Once the engine starts, carefully check for warning lights on the dashboard. In vehicles such as the Honda Civic, battery or alternator warning indicators may signal deeper electrical issues.
Disconnect Jumper Cables in the Proper Sequence
Disconnecting cables must be done in reverse order of connection to avoid sparks or short circuits. Many beginners overlook this step, but it is just as important as connecting them correctly.
Follow this order:
- Remove black clamp from grounded metal on previously dead car
- Remove black clamp from donor battery
- Remove red clamp from donor battery
- Remove red clamp from previously dead battery
Keep clamps from touching each other while handling them. Store cables carefully after use to prevent damage or corrosion.
After disconnection, let the revived vehicle run for at least 20–30 minutes. This helps the alternator recharge the battery sufficiently for the next restart.
Troubleshoot When the Car Still Won’t Start
Sometimes, even after a proper jump start procedure, the car may fail to start. In such cases, the issue may not be limited to the battery.
Common causes include:
- Severely discharged or damaged battery
- Faulty alternator
- Corroded or loose battery terminals
- Starter motor failure
- Blown fuses or ignition system issues
Troubleshooting Overview Table
| Symptom | Possible Cause | Suggested Action |
|---|---|---|
| Clicking sound only | Weak battery or starter issue | Recheck connections or replace battery |
| No electrical power | Dead battery or loose terminals | Clean and tighten terminals |
| Engine cranks but won’t start | Fuel or ignition issue | Inspect fuel system or spark plugs |
| Repeated failure after jump | Bad alternator | Visit mechanic for diagnosis |
If the battery repeatedly fails to hold charge, replacement is often the only reliable solution. Automotive batteries typically last 3–5 years depending on usage and climate conditions.
Use Alternative Jump Starting Methods
While jumper cables are the traditional method, modern alternatives can be more convenient and safer in certain situations.
Portable Jump Starter Packs
A portable jump starter is a compact lithium-powered device that can start a vehicle without another car. It connects directly to the battery terminals and provides instant power. This method is especially useful in remote areas.
Push Start Method (Manual Transmission Only)
For vehicles with manual transmission, a push start may be possible if the battery is not completely dead. This involves rolling the car and engaging the clutch in second gear to start the engine.
However, this method should only be used when necessary and with sufficient control over the environment.
Roadside Assistance
If unsure, professional roadside services remain the safest option. They can diagnose whether the issue is battery-related or a deeper electrical malfunction.
Prevent Future Battery Failures
Preventing battery failure is more effective than repeatedly learning how to jump start a car. Regular maintenance significantly extends battery life and reduces emergency situations.
Key preventive practices include:
- Turning off headlights and interior lights when exiting the vehicle
- Regularly checking battery terminals for corrosion
- Driving the vehicle for at least 15–20 minutes regularly
- Replacing old batteries before complete failure
- Avoiding extreme heat or cold exposure when possible
A healthy battery ensures smooth performance for vehicles like the Toyota Camry, especially during seasonal temperature changes that often affect battery efficiency.
Safety Precautions When Jump Starting a Car
Safety must always remain the top priority during any jump start procedure. Car batteries contain sulfuric acid and produce flammable gases, making improper handling potentially dangerous.
Important safety rules include:
- Never smoke near a car battery
- Avoid touching metal clamps together
- Wear protective gloves if available
- Ensure correct polarity before connecting cables
- Do not attempt jump start if battery is cracked or leaking
Taking these precautions reduces risk of injury and prevents damage to the vehicle’s electrical system.
Conclusion
Understanding how to jump start a car is an essential driving skill that can save time, money, and stress during unexpected battery failure. By following a structured process positioning vehicles safely, connecting jumper cables correctly, starting the donor vehicle, and carefully restarting the dead car you can restore functionality quickly and safely.
However, repeated battery issues may indicate deeper electrical problems that require professional inspection. Regular maintenance, awareness of warning signs, and proper driving habits significantly reduce the likelihood of future breakdowns.
FAQ’s
1. How long does it take to jump start a car?
It typically takes 5 to 15 minutes, depending on battery condition and donor vehicle strength.
2. Can I jump start a car in the rain?
Yes, but it is safer to avoid wet conditions if possible due to electrical risks.
3. What happens if jumper cables are connected incorrectly?
Incorrect connection can cause sparks, fuse damage, or serious electrical system failure.
4. Can a completely dead battery be revived?
Sometimes yes, but if the battery is deeply discharged or old, replacement is often required.
5. Do I need to drive after a jump start?
Yes, driving for at least 20–30 minutes helps recharge the battery through the alternator.
6. Is a portable jump starter better than cables?
It is more convenient and safer in many situations, especially when no second vehicle is available.


